
Incoming Inspection Checklist for TFT LCD Modules
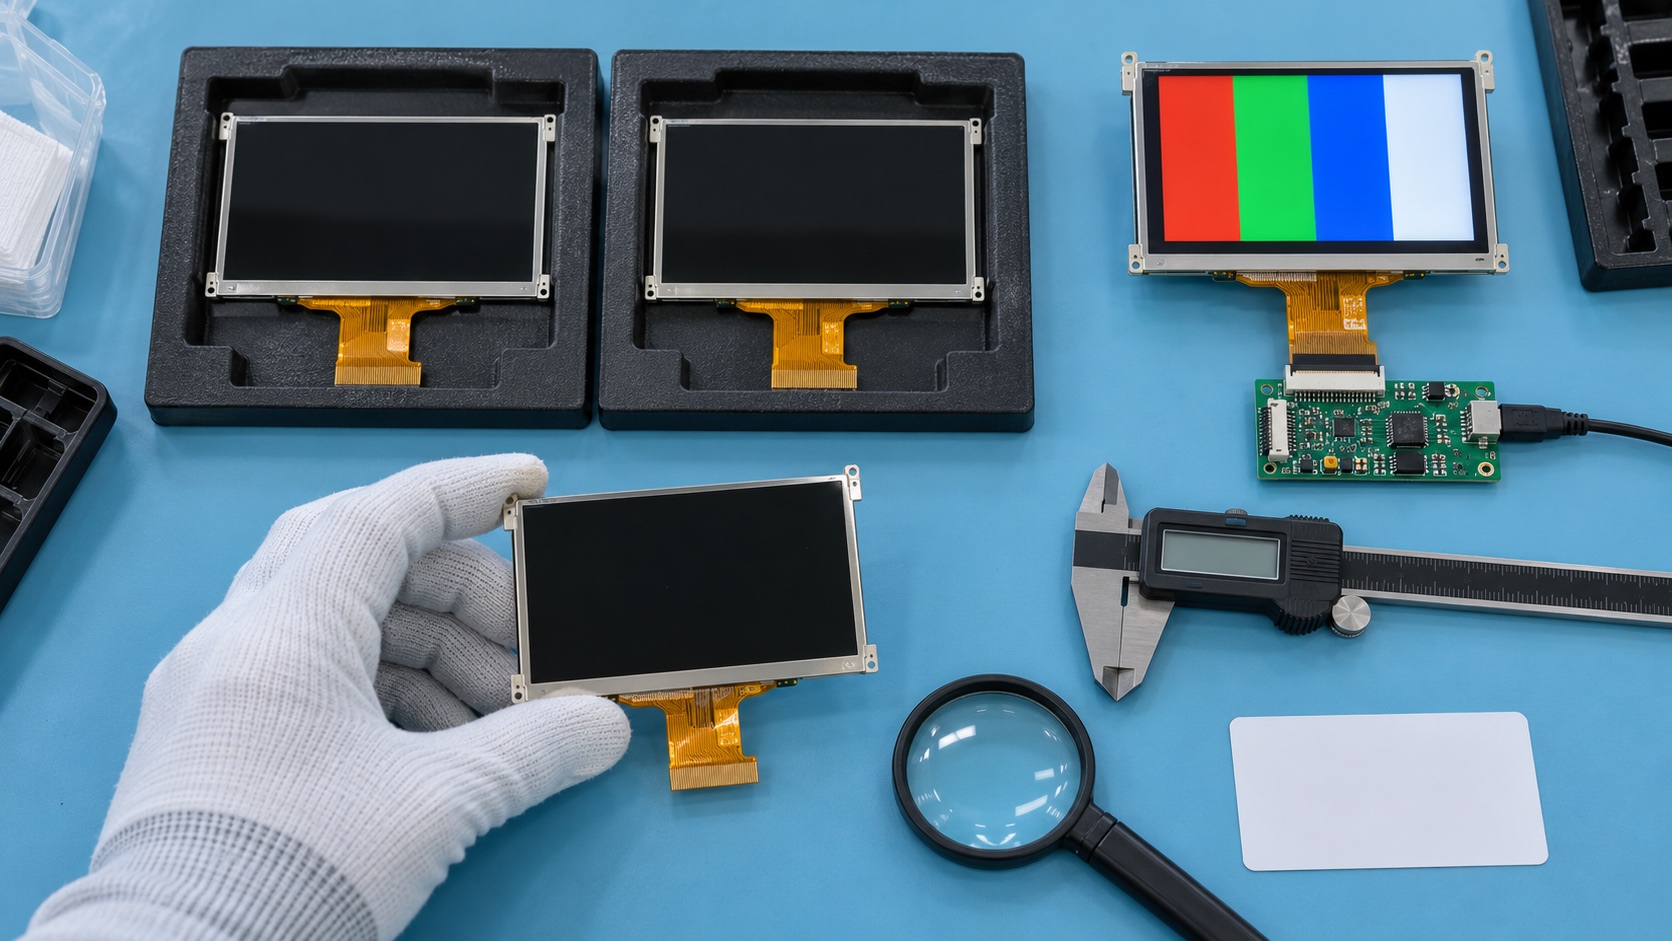
A useful TFT LCD incoming inspection checks delivered units against an approved product definition and produces a traceable lot decision. It should combine identity, mechanical, visual, powered-display, and touch checks with a documented sampling plan. Simply turning on one screen is not an adequate release process.
This checklist is a framework to adapt with your supplier and quality team. It is not a universal acceptance standard or a claim that a particular lot has passed. The Hero is an AI-generated inspection-scene illustration.
Prepare the Acceptance Definition Before Delivery
Collect the approved datasheet revision, mechanical drawing, pinout, firmware requirements, cosmetic criteria, optical limits, and golden-sample references where applicable. Resolve ambiguous terms such as “no obvious mura” before the shipment arrives.
Define defect classes using the product’s consequences and customer agreement. A cosmetic mark, incorrect connector orientation, and unintended touch event need not belong to the same class. Avoid importing another product’s categories without review.
Use the datasheet reading guide to identify which values are guaranteed limits and which are typical examples. Incoming inspection should not reject parts against a typical value as though it were a contractual minimum.
Start with Identity, Packaging, and Traceability
Record purchase order, supplier, part number, revision, quantity, manufacturing lot, and any serial range. Keep lots separate unless the approved sampling plan explicitly defines a combined population. Mixing revisions can obscure the cause of a later failure.
Check packaging damage, protective materials, and handling indicators if specified. Photograph unusual shipping conditions before removing the evidence. A damaged carton does not prove the module failed, but it changes what needs investigation.
Use the required ESD controls and clean handling practices. Let material reach the specified inspection condition before powering it, especially after cold transport. Avoid condensation and follow the supplier’s storage and recovery guidance; see operating versus storage temperature.
Core Incoming Inspection Checklist
| Check | Method or reference | Evidence to retain |
|---|---|---|
| Identity | Compare labels and revision with order and approved specification | Lot record and label image |
| External appearance | Defined lighting, distance, angle, and cleaning method | Defect location and scale |
| Mechanical fit | Approved drawing and calibrated suitable instruments | Measured critical dimensions |
| FPC and connector | Check contacts, stiffener, bends, damage, and orientation | Close-up image if abnormal |
| Powered image | Qualified fixture and defined patterns | Pattern, configuration, and result |
| Optical properties | Agreed instrument geometry and stabilization | Raw reading and test condition |
| Touch function | Defined grid, edges, gestures, and input method | Misses, offset, or unwanted events |
| Lot disposition | Approved acceptance plan and authorization | Accepted, held, or rejected status |
Inspect only with methods that will not damage the product. Do not press caliper jaws onto an active display area, sharply crease an FPC, or use an improvised connector that can scratch contacts.
Make Visual Inspection Repeatable
Specify ambient lighting, viewing distance, viewing angle, screen state, and observation time. A defect visible only under an extreme flashlight angle may not fall under the same criterion as one visible during normal use.
Distinguish contamination on a removable protection film from defects in the cover, polarizer, or internal stack. Use only approved cleaning methods. Record whether the protective film was present during inspection so later reviewers can reproduce the result.
For scratches, particles, bubbles, and edge defects, define permitted size, count, spacing, and screen zones. A photograph should include location and scale, but camera processing can distort brightness and contrast; do not replace an agreed visual or instrument method with an uncalibrated phone image.
Use a Qualified Powered Test Fixture
Verify pinout, voltage, current limit, timing, and initialization before connecting production units. Support the module mechanically without twisting it. Connect and disconnect with power removed unless hot-plug behavior is explicitly supported.
Use a known-good reference module to check the fixture at appropriate intervals. Record test software and pattern-generator versions. A fixture fault can otherwise make an entire conforming lot appear defective.
Run black and white patterns to inspect bright and dark defects, then red, green, and blue to distinguish subpixel behavior. Gray patterns can help reveal nonuniformity; line or checker patterns can expose addressing or interface issues. Exact pattern values and limits belong in the approved procedure.
Check the full active area, including corners and edges. Define pixel-defect acceptance by type, count, clustering, and zone rather than using an unexplained “zero dead pixels” promise. If zero visible pixel defects are required, make the method and detection conditions explicit in the purchase specification.
Keep Optical Measurements Comparable
Brightness and color measurements require controlled geometry, backlight setting, stabilization, and ambient conditions. Record whether the measurement is through the final cover stack or directly at the module. These results are not interchangeable.
For uniformity, define measurement locations and the calculation. Different point grids or formulas can produce different results from the same screen. Use the brightness calibration guide and display calibration workflow to align the method with production needs.
Inspect an approved reference sample under the same conditions, but remember that reference samples can age or be damaged. Periodically verify their suitability rather than treating them as permanent measurement standards.
Test Touch as Its Own Function
A good image does not demonstrate good touch performance. Check coordinate orientation, edge coverage, taps, holds, drags, and release behavior as required. Record the controller firmware and configuration.
For glove-qualified products, use the specified glove and procedure from the glove-operation test plan. A bare-finger tap at the center does not verify the approved glove capability.
Incoming tests usually confirm a subset of already qualified functions. They should not be confused with full environmental, EMC, life, or abuse qualification. Decide which checks require every unit, a sample, periodic audit, or supplier evidence based on risk.
Apply Sampling Without Inventing an AQL Rule
The NIST acceptance-sampling overview distinguishes deciding whether to accept a lot from estimating the lot’s quality. A passing sample does not prove that all remaining modules are defect-free.
The ASQ quality glossary explains AQL in the context of a satisfactory process average for a continuing series of lots. It should not be interpreted as permission to include a fixed percentage of defective units in every shipment.
Agree the lot definition, sampling standard and edition, inspection level, defect classes, and switching rules where applicable. Then derive the sample size and acceptance/rejection numbers from that plan. Do not improvise a sample size because it fits the available inspection time.
Select samples across the defined lot using the approved randomization method. Avoid taking only the easiest units from the top carton. Where risk requires 100% testing, specify that separately instead of presenting a sample plan as equivalent.
Preserve the Decision and the Failure Evidence
A useful lot record includes inspector, date, equipment identification, calibration status, fixture revision, sampled serials, results by defect class, images, and final authorization. Record deviations and concessions explicitly.
If the lot fails, quarantine it and retain the original evidence. Follow the agreed investigation, sorting, rework, or controlled resubmission process. Do not keep drawing new samples until one passes.
Feed recurring defects back into supplier corrective action and design review. Incoming inspection is a detection layer, not a substitute for a capable manufacturing process. Its value comes from repeatability, traceability, and a clear response when delivered modules differ from the approved product.
Frequently Asked Questions
What should TFT LCD incoming inspection cover?
Check lot identity and revision, packaging, appearance, critical dimensions, FPC condition, powered image patterns, relevant optical properties, and touch function where fitted. Use agreed acceptance criteria and record the lot disposition.
Does a passed sample guarantee that every LCD in the lot is good?
No. Acceptance sampling supports a lot decision with defined statistical risks. It does not prove that every unit conforms or replace supplier process control.
What AQL should I use for LCD modules?
There is no universal LCD AQL. Agree defect classifications, applicable sampling plan, inspection level, lot definition, and acceptance criteria with the supplier based on product risk and contractual requirements.
Which display patterns help reveal LCD defects?
Black, white, red, green, blue, gray, and suitable line or checker patterns reveal different issues. Specify pattern values, luminance, viewing conditions, stabilization, and defect limits so results are repeatable.
Should a rejected lot be sampled again until it passes?
No. Quarantine it and follow the agreed rejection, investigation, sorting, rework, or resubmission process. Repeated unplanned sampling undermines the original acceptance plan.